Roof Leaking Around the Chimney? Why the Flashing Almost Always Fails First
October 15, 2026

Skylights are a functional and aesthetic asset, but only when they are installed and maintained with precision. From the structural modifications required during installation to the layered flashing systems that keep water out, every phase of skylight work carries real consequences when it goes wrong. Investing in professional services at the outset prevents far more serious problems down the line. Whether a skylight is newly planned or already showing signs of wear, the right professional guidance makes a measurable difference in performance and longevity.
Lindsey Roofing
has served homeowners in Olive Branch, Mississippi for over 38
years, building a reputation grounded in technical precision and honest work. We specialize in residential roofing and repair services, including
skylight installation, flashing repair, and full roof assessments. Our experience across decades of Mississippi weather gives us a practical understanding of what roofing systems in this region actually face. We approach every skylight project the same way we approach every roof: with thorough inspection, sound materials, and workmanship designed to hold up over time. Homeowners in the Olive Branch area trust us not because of what we promise, but because of what we deliver on every job. When skylights need installation, repair, or a professional second opinion, we bring the depth of knowledge that only comes from decades of hands-on roofing work.
Water intrusion around skylights is the most reported problem in residential roofing. In most cases, the leak does not come from the skylight unit itself but from the flashing system surrounding it. Sealant-only installations — where caulk replaces proper flashing — are a frequent cause. Caulk degrades, shrinks, and separates over time, especially under thermal cycling and UV exposure. Once it fails, water finds the path of least resistance directly into the roof deck and ceiling below.
Condensation that forms on the inside of a skylight is a different problem from a leak, though homeowners often confuse the two. Interior condensation indicates a thermal break failure or inadequate ventilation around the unit. It is particularly common in bathrooms and kitchens where humidity levels run high. The fix may involve upgrading to a double-pane or triple-pane unit, improving room ventilation, or addressing air sealing around the skylight frame.
Condensation on Interior Surfaces
Common Skylight Problems and Their Root Causes
Leaks and Water Intrusion
A professional skylight repair begins with a thorough inspection rather than an immediate fix. This includes checking the flashing sequence, examining the roof deck for rot or saturation, testing the glazing seals, and assessing the curb or frame for movement or settling. Jumping to a quick sealant patch without understanding the full picture typically results in the same problem returning within a year.
Diagnosis Before Action
Cracked or Damaged Glazing
Older skylights often used acrylic or polycarbonate glazing, both of which yellow, crack, and become brittle over time. Modern installations favor tempered or laminated glass, which holds up significantly better under impact and UV exposure. A cracked skylight panel should be addressed promptly. Beyond the obvious leak risk, cracked glazing can fail unpredictably under load, creating a safety concern during heavy rain or snow.
When glazing needs replacement, the unit must often be partially or fully removed to do the job correctly. Frame repairs may involve reseating the skylight on its curb, shimming for level, and reapplying sealant to the interior trim. In cases where the frame has deteriorated due to prolonged moisture exposure, full unit replacement is the more practical path.
Glazing and Frame Repairs
Quick Answer: When a roof leaks around a chimney, the flashing is the culprit far more often than the shingles or the brick. Flashing is the thin metal that seals the joint between the roof and the chimney, and it has to survive two materials that expand and shrink at different rates. Over years of Mid South heat, humidity, and hard rain, the sealant dries, the metal pulls loose, and the mortar that holds the top layer in place wears back. Water finds even a small gap and runs inside the roof long before you see a stain. Repairing the failed flashing detail fixes the leak. Smearing tar over it only hides the problem for a season.
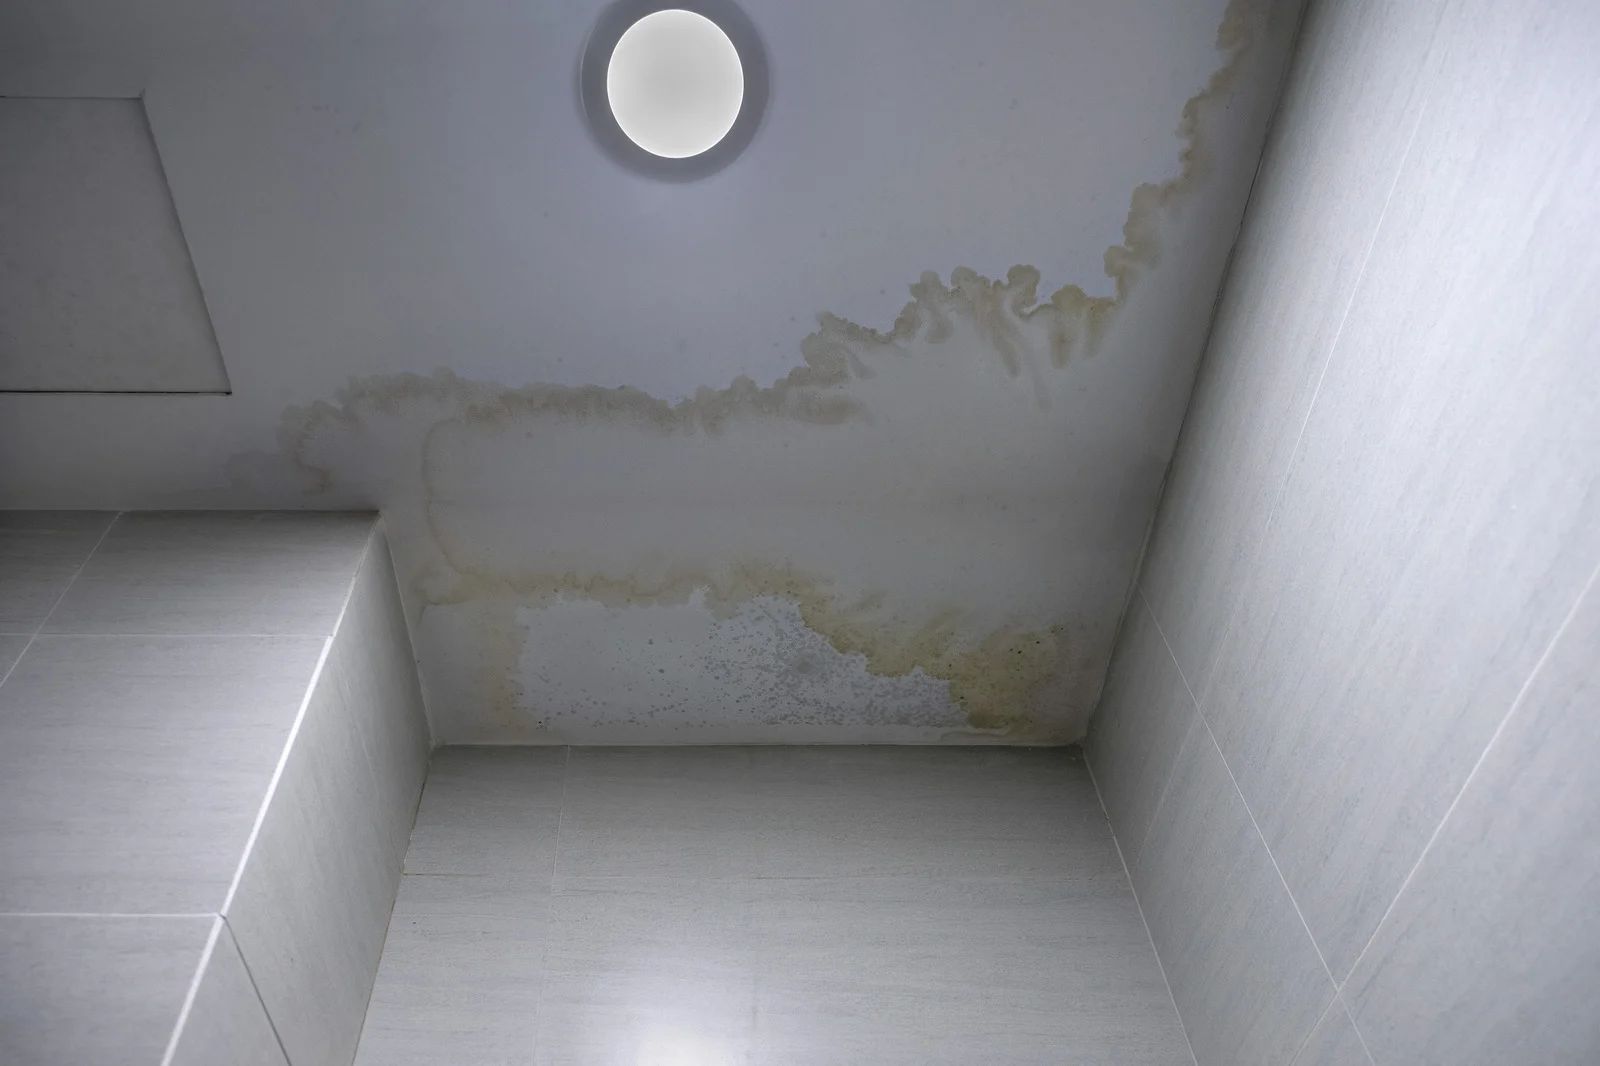
You hear it before you see it. A hard thunderstorm rolls through Southaven or Collierville, the rain comes sideways for twenty minutes, and the next morning there is a brown ring on the ceiling near the fireplace wall. Or maybe you notice a damp smell in the upstairs closet that backs up to the chimney. The shingles look fine from the driveway. The chimney looks solid. Nothing seems to be broken.
That is the frustrating part of a chimney leak. The brick and the shingles are rarely what failed. What failed is a narrow band of metal and sealant you have probably never looked at closely, and it sits at the most demanding spot on the entire roof. Here is why that joint gives out first, what each part of the system does, and how to tell whether what you are seeing is a flashing problem.
Why the Chimney Is the Hardest Place on the Roof to Keep Dry
A chimney is a masonry tower that rises through a wood framed roof. Those two structures do not behave alike. Brick and mortar are heavy and rigid. A roof deck is lighter, and it moves a little with temperature, moisture, and wind. Every day the roof deck and the chimney shift by tiny amounts relative to each other, and the flashing has to bridge that moving gap without cracking.
Add the climate. A Memphis area summer pushes roof surfaces well past one hundred and fifty degrees on a sunny afternoon, then a pop up thunderstorm cools everything within minutes. In winter, a cold snap followed by a damp, mild week puts moisture into the mortar and then stresses it again. Metal expands and contracts. Sealant bakes and hardens. Mortar absorbs water like a sponge. Do that for fifteen years and something at the joint gives way.
Water also behaves differently at a chimney. On an open roof, rain runs downhill in a sheet and off the edge. When it reaches a chimney it hits a wall, slows down, and piles up on the uphill side. That pooling is why chimney leaks tend to show up during heavy, fast rain rather than light drizzle, and why a roof can look dry for months and then leak badly in one storm.
The Four Parts of a Chimney Flashing System
Most homeowners picture one strip of metal. A properly built chimney flashing job is a layered system, and a leak means one of the layers failed. Knowing the parts makes it easier to understand what a roofer finds when he gets up there.
Base Flashing
This is the metal that sits along the bottom, or downhill face, of the chimney. It lies over the shingles and turns up the brick. Because it carries the most water, it is the first place you see rust, lifted edges, or sealant that has split.
Step Flashing
Along the sides of the chimney, small individual pieces of metal are woven in between each course of shingles, stepping up the roof beside the brick. Each piece overlaps the one below it, so water is always directed down and out. The system works well when every piece is in place. It fails when pieces were skipped, when they were replaced with one long strip of caulk and sealant, or when nails backed out and let the metal lift.
Counter Flashing
This is the part most people never see. It is a second layer of metal that is tucked into a groove cut in the mortar joints and hangs down over the top of the base and step flashing. Its job is to shed water off the brick and over the lower layer. Mortar holds it in place, so when the mortar crumbles, the counter flashing loosens and rain slips behind it.
The Cricket, Or Saddle
On the uphill side of a wide chimney, a small peaked structure is built to split the water and send it around both sides instead of letting it dam up. Building guidance generally calls for one on chimneys wider than about thirty inches. Without it, water and debris pile against the chimney wall and sit there. Many older homes in Olive Branch and Germantown were built without one, and the leak shows up on the uphill side first.
The Most Common Ways Flashing Fails
Once you know the layers, the failure points become predictable. A roofer looking at a leaking chimney is usually checking a short list.
Dried And Cracked Sealant
Chimney leaks often begin when sealant dries, shrinks, and separates from brick and metal. Sealant supplements flashing but cannot replace it.
Mortar That Has Worn Back
Weather gradually erodes mortar joints supporting counter flashing. Even narrow gaps allow wind-driven rain behind metal, creating leaks between masonry and roofing.
Metal That Has Corroded Or Lifted
Galvanized steel can rust around edges and nail heads. Strong Mid South thunderstorms may lift loose flashing, allowing rain underneath and spreading damage.
Flashing That Was Never Installed Correctly
Incorrect overlaps, missing step flashing, or counter flashing attached improperly can cause delayed chimney leaks. Sealant often conceals installation mistakes until damage appears.
Tip: After the next heavy rain, check the attic with a flashlight while the roof is still wet. Look at the roof deck and the framing right around the chimney for dark stains, damp insulation, or drip marks. A fresh trail that leads toward the chimney is strong evidence that the leak is at the flashing and not somewhere else on the roof.
Why You Cannot Trust Where the Stain Appears
Water that gets in at the chimney rarely drips straight down onto the ceiling below. It lands on the roof deck, follows a rafter or a sheet of plywood downhill, and drips off at the lowest point it can find. A stain can show up several feet from the chimney, sometimes in a different room.
That makes a leak around a chimney easy to misdiagnose. A homeowner sees a stain in the hallway, a general repair is done to the nearest shingles, and the next storm brings the water right back. Without tracing the path uphill to the actual opening, you end up fixing the wrong spot. This is one reason experienced roofers start at the chimney when a leak appears anywhere near it.
Why Patching with Sealant Rarely Holds
It is tempting to climb up with a tube of caulk or a bucket of roofing cement. We understand the impulse, especially with rain in the forecast. The trouble is what sealant actually does at this joint.
Sealant bonds to a clean, dry surface and holds only as long as the joint does not move. A chimney joint moves every day. The patch cracks along the same line the original sealant did, usually within one or two seasons, and now there is a layer of old cement sitting over the problem hiding the real condition of the metal underneath. When a roofer later removes it to repair the flashing properly, the job takes longer, because the old material has to come off first.
There is a safety angle too. A steep roof slick with humidity or pollen is a bad place to work with one hand while holding a tube of sealant in the other.
Warning: Avoid walking the roof around a chimney yourself, particularly after rain or early in the morning when dew or moisture is on the shingles. The area around a chimney is where the surface is most uneven and where loose metal edges can cut. A fall from a residential roof is one of the more common serious injuries in home maintenance, and what you would gain from a quick patch is not worth it.
Signs the Chimney Flashing Is Starting to Fail
Not every chimney leak announces itself with a ceiling stain. Early warning signs are often visible from the ground or the attic if you know what to look for.
Look at the chimney from the yard with binoculars. Rust streaks or white mineral staining running down the brick below the flashing line suggest water is moving where it should not. A visible gap between the metal and the brick, a lifted corner, or a heavy band of black cement are all worth noting. Inside the attic, look for dark rings on the wood, rusty nail points that look wet, or insulation that is matted or discolored near the chimney chase.
Pay attention to timing as well. If you notice dampness only after strong, wind driven storms and not in a slow steady rain, the flashing is a likely suspect. Wind pushes water sideways into the small gap that gravity alone would never find.
What a Proper Chimney Flashing Repair Looks Like
A repair that lasts addresses the system, not just the symptom. A careful roofer starts by removing the failed material down to a sound surface, inspecting the deck beneath it for moisture damage, and checking the mortar joints that hold the counter flashing. If the mortar is worn, it gets repointed so the metal has something solid to anchor to.
New base flashing and individual pieces of step flashing are then installed in the correct overlapping order, woven into the shingle courses the way water expects to flow. New counter flashing is cut into the mortar joints, set, and sealed. Where a wide chimney has no cricket, building one is often the smartest move, because it removes the cause of the pooling rather than just managing its effects. Aluminum, copper, and galvanized steel are all used for this work, and the right choice depends on the roof and the look of the home.
Done right, the new system sheds water the way the original design intended. Repairs like this are usually completed in a day, and the chimney itself should be looked at during the same visit so one trade does not undo the other.
How Often a Chimney Joint Should Be Checked
Because chimney flashing sits at the top of the list for leaks, it deserves a regular look. A yearly check is a sensible rhythm, ideally in the fall before winter rain and after any severe storm with strong winds or hail. Roofs that are more than ten or fifteen years old, or have sealant visible around the chimney, benefit from a closer look sooner.
Catching a gap while it is small means a small repair. Waiting until the deck is soft or the ceiling is stained means more to fix, and the damage to framing and insulation can run unseen for months.
Frequently Asked Questions
Why does my roof leak around the chimney only during heavy rain?
Heavy, wind driven rain pushes water up under the metal and piles it on the uphill side. Gaps that gentle rain ignores overflow, pointing to flashing, counter flashing, or a missing cricket.
Can I fix chimney flashing by sealing it with roofing cement?
Sealant may slow a leak briefly, but it cracks within a season or two at a moving joint. A lasting repair reinstalls the flashing, overlapped correctly and anchored into the mortar.
How do I know if the leak is the flashing or the chimney itself?
Flashing leaks usually show as attic stains near the chimney base. Masonry problems appear higher, like cracked mortar, a damaged crown, or damp brick inside. A roofer and mason often check both.
What is a chimney cricket and does my home need one?
A cricket is a small peaked structure on the uphill side that diverts water around the chimney. Chimneys wider than about thirty inches generally need one, especially with uphill leaks.
How long does flashing last on a Memphis area roof?
It varies with metal, installation, and exposure, but flashing and sealant often show wear within ten to fifteen years in local heat and humidity. Yearly checks catch problems early.
Should I replace the flashing when I replace my shingles?
Usually yes. Old flashing rarely reuses cleanly under new shingles, and a roof is only as watertight as its weakest detail. Replacing it avoids reopening the joint later.
Following the Water Back to Its Source
A leak at the chimney is almost always a story about a narrow strip of metal and the mortar, sealant, and shingle courses around it. The roof field is rarely the problem, because the joint is. Understanding the base, step, and counter flashing, along with the cricket, shows why a quick dab of cement keeps failing. The repair that lasts follows the water uphill to the actual opening and rebuilds the detail correctly, so a small stain never becomes a soaked deck.
Lindsey Roofing
has worked on roofs in Olive Branch, MS for 38+ years, and that history shows in how a
chimney leak is traced. Checking the flashing layers, the mortar that anchors them, and the uphill side where water tends to pile up keeps the repair focused on the real opening. Homeowners end up with a joint built to handle the heat, humidity, and hard downpours of the Mid South, and a roof that stays dry through each storm season.